UNIT: Julien Vida, Tools Commissar, Mastering Dept.
TO: Arma 3 Content Creators
OPSUM: May I have this car, in pink, with all options, please?
Give me a rainbow van
Beware, mortals, the text you are about to read may contain a large dose of technical information, which might be hard to digest on an empty stomach:
If you've already discovered the brilliant depths of Arma 3 content creation, you might very well be more than interested in the new vehicle customization options we've deployed a few months ago. Did you ever wonder what color of the civilian car you just placed in the Editor would be? There's now a deeper system running in the background that will surprise you every time. We call this 'vehicle customization' (VhC) and you may have already seen bits of Intel on this system scattered around the forums.
In short, vehicles now have a bunch of animation and texture sources you can play with. To do so, you can create your own templates in the scenario config file. If you want to test this feature, just open Arma 3, run the Arsenal, and choose your vehicle: Customize / Export / Test!

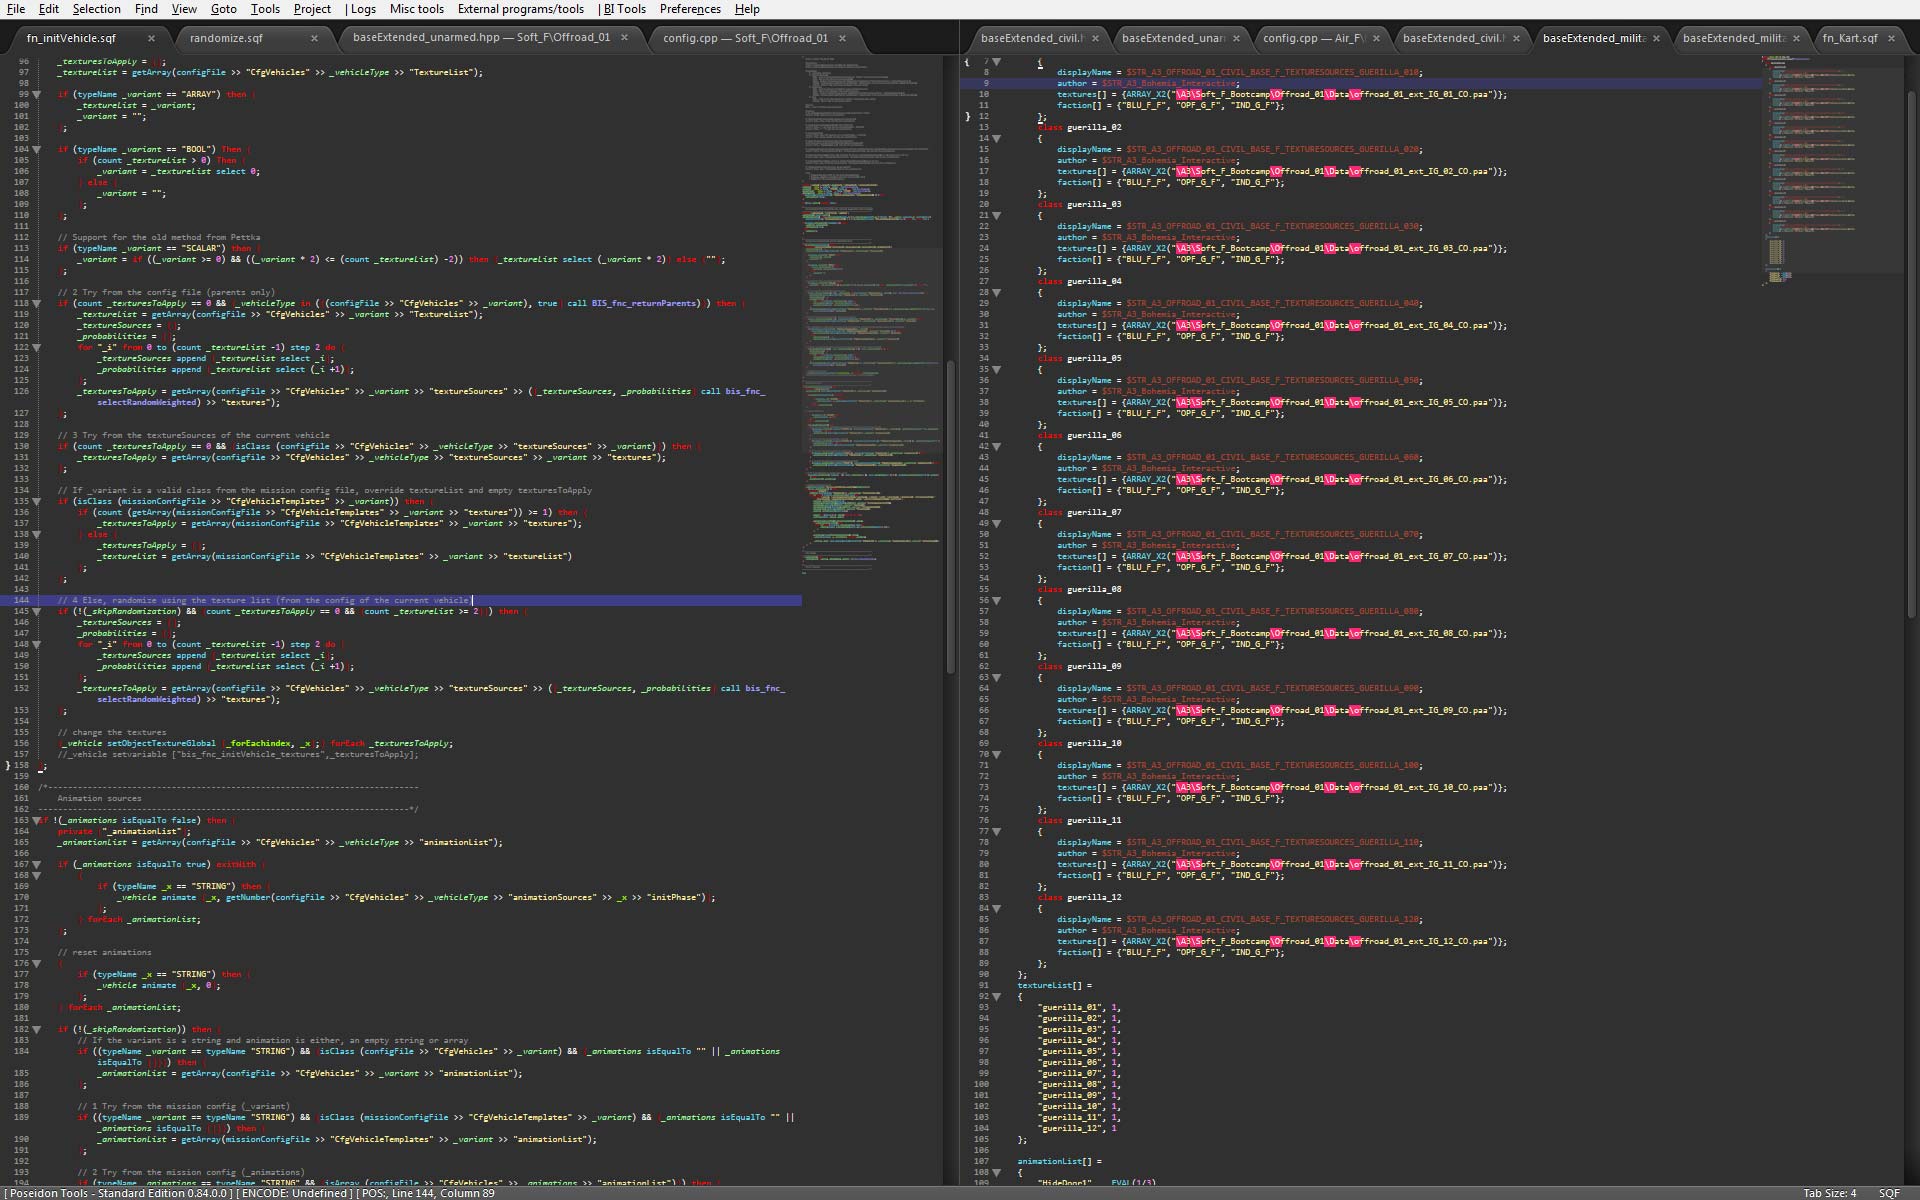
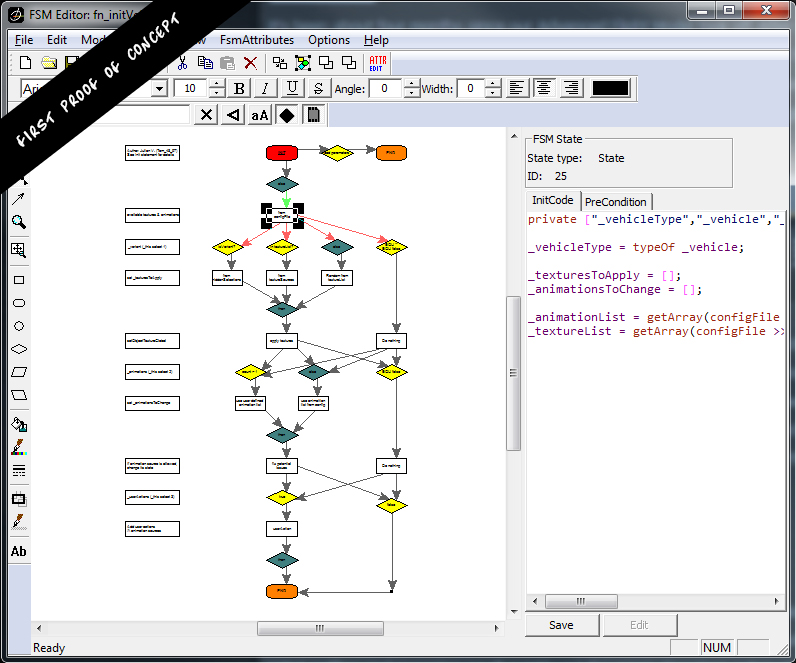
First we refactored configs to prepare for implementation of the new method. This new system to randomize and customize vehicles replaced the previous performance-hungry scripted solution. VhC is quite simple; in the configuration, there is a list of available textures and animation sources, a function reads them and applies a 'variant' according to parameters set in config or the scenario config file. If you want to know more, I invite you to consult this page.
I like it, but do you have it in a different color?
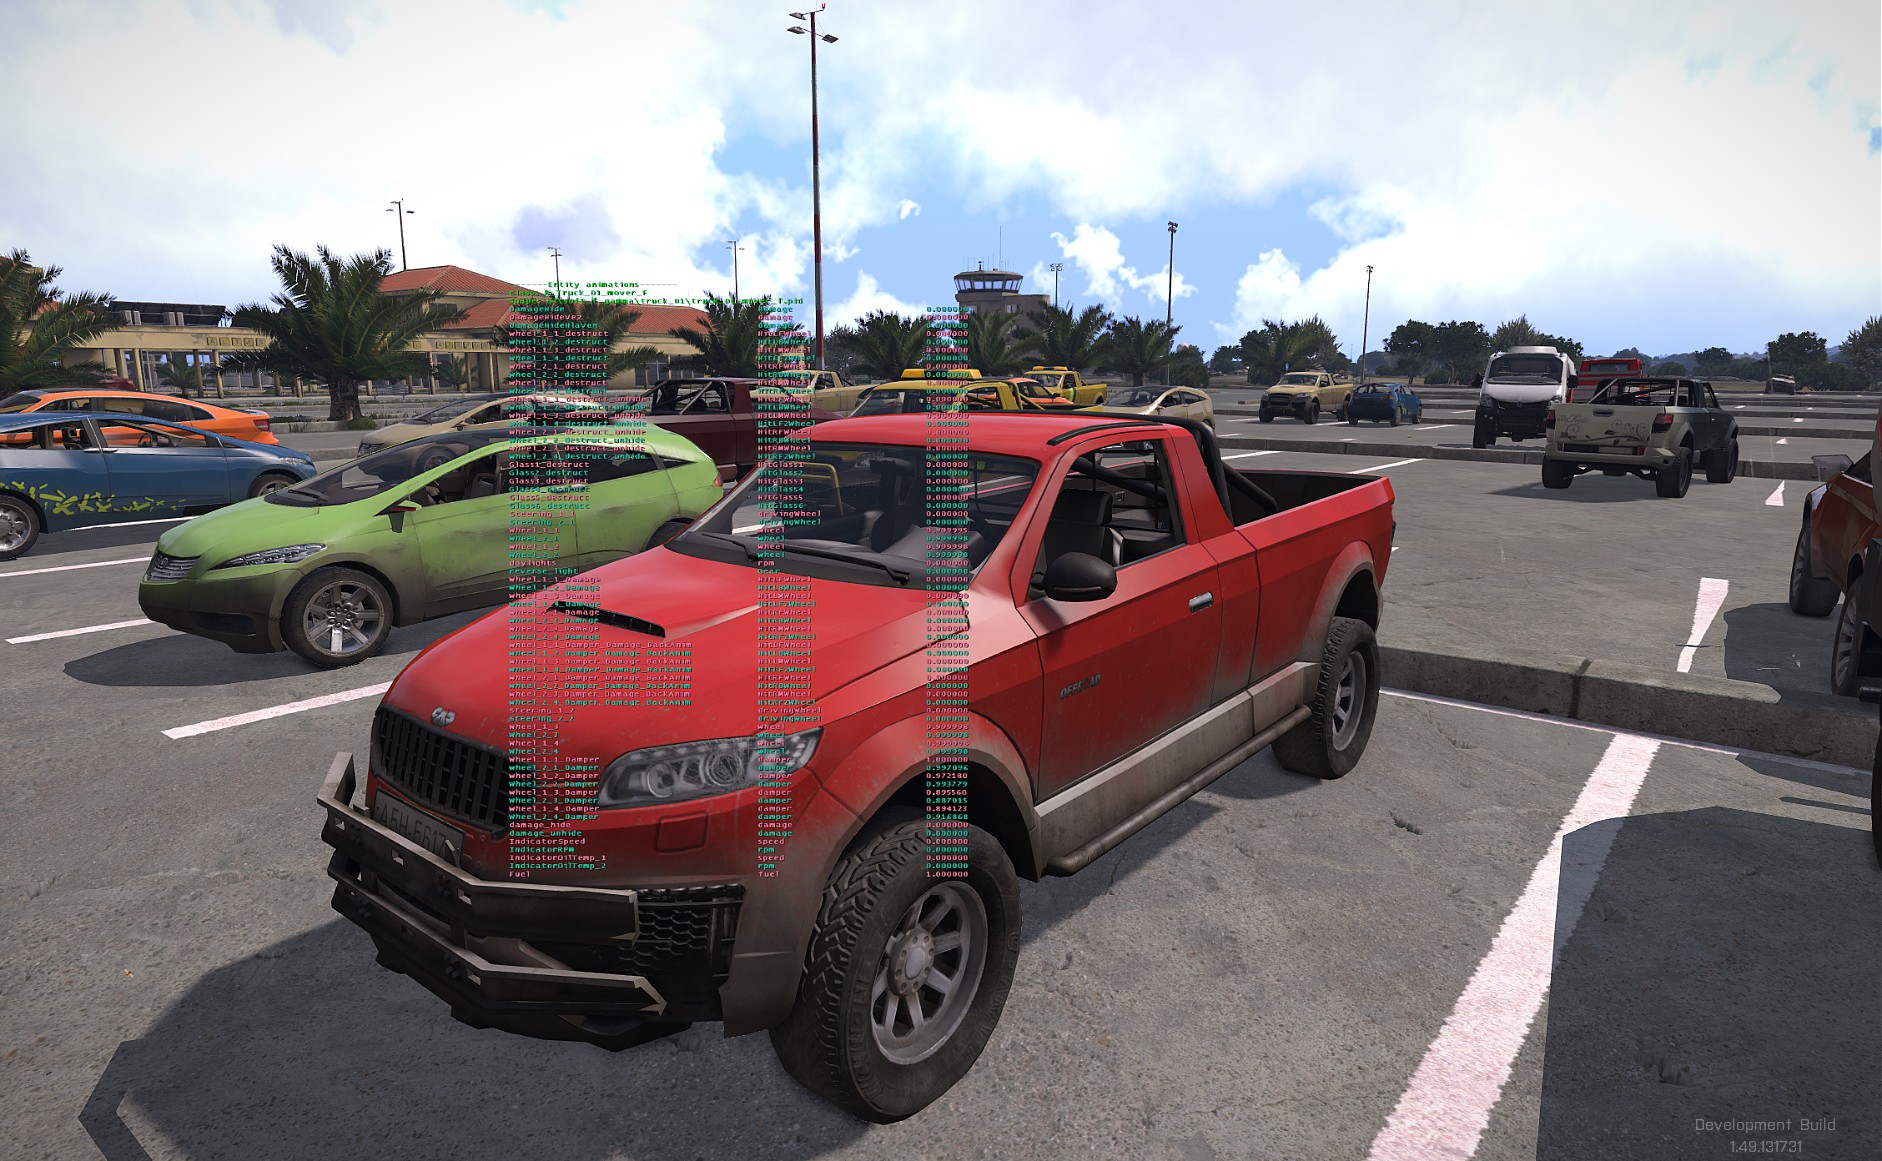
Virtual Arsenal, and mainly its Virtual Garage component, is the most convenient way to see every customization option available. We have added a customization menu to most vehicles, where you can change not only the skin (visual style of vehicle based on several pre-made textures), but also add some interesting parts like benches for helicopters, beacons for motor boats, and various bags on top of an off-road pick-up truck. All of that is now just a few clicks away. The underlying system uses optimized functions instead of basic scripts to do all the magic in the configs.
This way, you can easily change the livery of a vehicle without having to remember the full path to the texture files (some vehicles have more than one selection for their livery). There are multiple opportunities to use VhC. Its primary usage is to select a texture class and apply its texture list, but as you will see below, it's also able to randomize from a given pool of texture classes (["TextureSource1", 0.52, "TextureSource2", 0.65]) and restore the default texture configured in the config.
MOAR OPTIONS
Next up is another significant part of vehicle customization possibilities: the animation sources. But wait, I can already do that with the animate command, so why should I use VhC? Fact is, VhC takes care of more than simply changing an animation phase. During the config refactoring, we've introduced a few parameters into the animation sources like lockCargo to lock the given cargo indices when the phase of the animation is the same as the other property lockCargoAnimationPhase. However, the most useful is forceAnimate, an array of animation sources and phases, which allows the system to hide or show the source, depending on the phase of the current animation source. It sounds a bit complicated, but you will find all the necessary information in the official published samples.
Last but not least, it's still in early stage, but there's an option to customize weight modification (artists out there may recognize this as mass in Object Builder). For example, if you add an element to a vehicle (e.g. a bumper on the off-road pickup truck), its mass will be increased. This means that adding something on a vehicle could have an impact on its behavior.
How to use this system?
The header of the function contains every relevant bit of information, so here you go:
BIS_fnc_initVehicle, header
Parameter(s): 0: vehicle to customize
1: Variant (textures)
BOOL - true to restore default texture source ; false to skip texture source change
VOID - Nil to skip the texture source change
ARRAY - Array of texture sources with their given probability: ["textureSource1", 0.5, "textureSource2", 0.5]
STRING - Variant class name(from the configFile >> cfgVehicles or from the missionConfigfile >> cfgVehicleTemplate)
SCALAR - index of the texture source (same as the old system)
2: Animations
BOOL - true to restore init phase of every animation sources
VOID - Nil to skip change of the animation sources
ARRAY - Array of animation sources and probability: ["AnimationSource1", 0.5, "animationSource2", 0.5]
STRING - Variant class name(from the configFile >> cfgVehicles or from the missionConfigfile >> cfgVehicleTemplate) Returns: BOOL - True if success, otherwise, false
Examples:
1) Do nothing because default VAR texture and VAR animation are "false"
result = [this] call bis_fnc_initVehicle;
2) Restore default texture and animation sources (reset)
result = [this, true, true] call bis_fnc_initVehicle;
3) Randomize everything according to the config file result = [this, "", []] call bis_fnc_initVehicle; //<-- Prefered
result = [this, "", ""] call bis_fnc_initVehicle;
4) Skip everything
result = [this, nil, nil] call bis_fnc_initVehicle; //<-- Prefered
result = [this, false, false] call bis_fnc_initVehicle;
5) Apply the given texture and ignore the animations
Priority is given to [missionConfigFile, "CfgVehicleTemplates"]
result = [this, "TemplateName", nil] call bis_fnc_initVehicle;
6) random weighted on the given texture sources and their probability, then randomize the animation sources according to the config file
result = [this, ["MyTextureSource1", 0.5, "MyTextureSource2", 0.6], []] call bis_fnc_initVehicle;
7) MyAnimationSource1 phase has a 50% chance to be set to 1 and MyAnimationSource2 has a 70% chance to be set to 1
result = [this, nil, ["MyAnimationSource1", 0.5, "MyAnimationSource2", 0.7]] call bis_fnc_initVehicle;
8) MyAnimationSource1 phase will be 1 whereas MyAnimationSource2 will be set to 0
result = [this, nil, ["MyAnimationSource1", 1, "MyAnimationSource2", 0]] call bis_fnc_initVehicle;
9) Change animation sources with a given template
result = [this, nil, "MyTemplate"] call bis_fnc_initVehicle; Based on community feedback about the randomization feature, you can simple disable it from the scenario config file (description.ext) using parameter disableRandomization[] or using the object variable BIS_enableRandomization for spawned vehicles.
Backward compatibility?
The new system fully replaces the old one, and to make this work, the scripts used for the old one are now calling the new functions. It's because of the initialization order and how the functions and scripts are called. There are two ways to run code in Arma 3 - Scheduled (based on the frame rate) and Unscheduled. VhC is now called and runs in an unscheduled environment, which means it will be executed before the parsing of the object initialization fields in the Editor. This prevents the usage of the variable enableRandomization directly from the Editor, yet on the other hand it greatly reduces the impact on performance.
That being said, the scripts still exist and the VhC system is initialized before the beginning of the scenario (init event handler), meaning that you can run the old scripts from the initialization field (from the Editor). However, the randomization of spawned vehicles (via script) can still be prevented, same as before via this setVariable ["enableRandomization", false];.
Plans
The system was released with Marksmen DLC and is in its final state or very close to it. The exception is the mass of the animation sources, which could receive some adjustments, including potential edits of the PhysX configuration of some vehicles.
We're looking forward to your suggestions, feedback and bug reports in this dedicated topic!